I will kick things off by talking about something quite special: heirloom seeds. These aren’t the run-of-the-mill seeds you might pick up at the local garden center; they’re time-honored legacies, passed down through generations, and they come with stories and history as rich as the soils they’re meant to be planted in.
The importance of maintaining genetic diversity in our crops can’t be overstated. This is about preserving plant varieties that have adapted to specific environments over decades or even centuries – a testament to their resilience and the diversity of nature’s offerings. By saving these seeds, we’re also safeguarding the unique flavors, colors, and textures that come with them.
You’re going to discover how to save these living heirlooms and why this practice is pivotal. It’s not just about the pleasure of watching your garden flourish; it’s also about contributing to a more genetically diverse and sustainable agricultural ecosystem. And yes, it’s a profound way to connect with your food and your cultural heritage.
Not sure where to start? Don’t worry too much about the nitty-gritty details just yet. I’m here to walk you through the process, ensuring you’re well-prepared to save and celebrate these botanical treasures. Choose something that resonates with you, because this is as much an art as it is a science.
In my opinion, seed saving is an adventure in patience and observation. A lot is happening very quickly in our gardens, and capturing that moment when a seed is ready to be harvested is a kind of magic. As we move forward, I will outline how to plan and grow for seed saving, setting the stage for a successful harvest.
Planning and Growing for Seed Saving
Now that you know what heirloom seeds are and why they’re critical for biodiversity, let’s move on to the key steps for planning and growing your garden with seed saving in mind. I’m here to help you with that!
One critical aspect to consider is cross-pollination. This is when plants of different varieties within the same species exchange pollen. While that’s great for genetic diversity, it might result in offspring that stray from the pure, heirloom characteristics you aim to preserve.
To ensure the seeds you save truly represent their heirloom lineage, there are preventative methods to consider. You can use physical barriers, such as planting different varieties at a distance from each other, or employ timing strategies, staggering the planting to prevent simultaneous flowering.
Choose something that resonates with you—whether that’s the most vibrant tomato on the vine or the heartiest bean pod. Selecting the best specimens isn’t just about looks; it’s also about choosing plants that show resilience to pests and diseases, among other desirable traits.
You’ll learn about recognizing seed maturity signs in the following sections because timing is everything. Harvest too early, and you might end up with underdeveloped seeds. Too late, and you could lose your seeds to decay or foraging wildlife. Proper timing ensures the longevity and viability of your seeds.
Identifying the Right Time to Harvest Heirloom Seeds
I will share with you the key indicators to look out for to know exactly when it’s the perfect time to harvest those precious heirloom seeds. This isn’t just about waiting until the end of the growing season; it’s also about observing your plants and understanding their unique signals.
You’ll find out about the telltale signs of seed maturity, which can greatly differ across plant species. For example, lettuces might signal readiness when their seed heads puff out and begin to turn brown, while tomato seeds are ready when the fruit is fully ripe and slightly overripe.
Now, the timing of your harvest is crucial and can be influenced by several factors. If you want to achieve the best viability, you’ll need to consider the weather—too much rain can ruin mature seeds, and too much delay can result in seeds being eaten by birds or falling to the ground. Always keep an eye out for the forecast and be ready to act swiftly when conditions are right.
Don’t worry too much about perfection with your timing. If you’re unsure, practice does make perfect. You can always adjust your approach down the road as you learn more about your specific plants’ cycles and local climate idiosyncrasies.
Harvesting Techniques for Different Types of Heirloom Seeds
Harvesting seeds is more than just a final step in gardening; it’s a way of capturing the legacy of your plants. And when it comes to heirloom seeds, how you harvest them can make all the difference. There are typically two categories of seeds: dry-seeded and wet-seeded, and each requires a unique approach.
Dry-seeded crops are those whose seeds mature within pods, husks, or capsules that naturally dry out. Think beans, lettuce, and okra. You’re going to wait until the pods are brown and brittle. If you try to harvest too early, the seeds may not be viable. A great tip is to listen for a rattling sound when you shake the pod – that’s when you know the seeds are ready to come out.
For wet-seeded crops, like tomatoes, cucumbers, and zucchinis, you’re looking for a different set of signs. These seeds are encased in flesh and must be removed and cleaned differently. Scoop the seeds out when the fruit is overripe, not just ripe. Overripeness ensures that the seeds have developed fully.
Once you’ve harvested the right seeds at the right time, you’re off to a good start, but we’re not done yet. Properly cleaning your heirloom seeds is your next critical step. It ensures they’re free from plant material and pathogens, which could jeopardize their germination when you plant them next season. This point segues perfectly into the process of cleaning and processing your seeds – vital for maintaining their integrity and ensuring a successful crop in the future.
Cleaning and Processing Heirloom Seeds
Now what is the next critical step after we’ve harvested our seeds? That’s right, cleaning and processing. Ensuring that the seeds are free from debris and are well-preserved is vital for successful planting in the future.
If you’ve collected dry seeds, your first task is to separate the seeds from the chaff. That might sound medieval, but it’s pretty straightforward. You can gently winnow the seeds by tossing them in the air on a breezy day, letting the chaff blow away. Sometimes, a simple fan and a shallow container do the trick. Ensure you do this in an open space where you won’t lose the good seeds.
The processing method is a bit different for wet-seeded crops like tomatoes and cucumbers. You’ll need to scoop out the seeds and the surrounding gel, then ferment this mixture for a few days. Fermentation helps to kill diseases and separates the good seeds, which sink, from the bad, which float. After fermentation, rinse the good seeds thoroughly and lay them out to dry.
Dry processing can involve screens, sieves, and even the good old-fashioned rolling pin for larger seeds. It’s all about gently threshing the seeds to remove husks, pods, or dried flower heads without damaging the seeds themselves. Always handle with care to avoid crushing your precious cache.
Once you’re confident the seeds are dry, we will focus on preserving their viability. That’s where proper storage comes in, and that will include some tips and tricks to maintaining the best possible environment for your heirloom treasures. This will ensure your hard work pays off when it comes time to plant the next season.
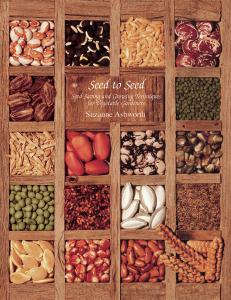
- Price: $24.95
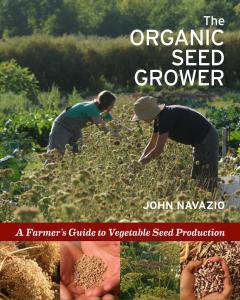
- Price: $39.95
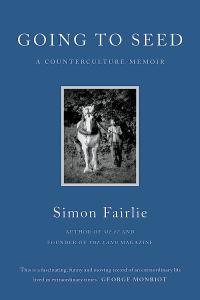
- Price: $19.95
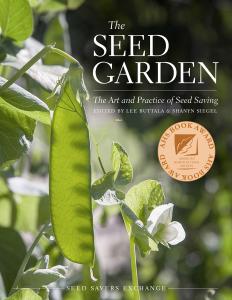
- Price: $39.95
- Price: $15.95
"Here's a little transparency: Our website contains affiliate links. This means we may receive a small commission if you click and make a purchase. Don't worry; there's no extra cost for you. It's a simple way you can support our mission to bring you quality content."
Drying and Storing Heirloom Seeds
Proper drying is CRUCIAL for the longevity of your heirloom seeds. Any leftover moisture could cause mold or fungal issues and damage your seeds in storage. Depending on humidity levels, you might need anywhere from a week to a couple of weeks for seeds to dry completely. You'll find out the best ways to ensure that your seeds remain viable until the next planting season. First, spread the seeds out in a single layer on a dry surface, like a screen or paper towel. Then, choose a warm, dry place out of direct sunlight with good air circulation. This step is where patience is your friend.
Now, here comes the tricky part. Humidity is a seed's worst enemy when it comes to storage. Use silica gel packets or even powdered milk wrapped in a tissue to keep the air in your storage container dry. You'll also want to make sure the container is airtight. Something like a glass jar with a sealable lid usually does the trick.
Choose something that resonates with you regarding where you store your seeds. It should be stored in a cool, dark cupboard or a refrigerator, although refrigerators may not provide consistent humidity. Consistency in temperature is key, and typically, you're aiming for temperatures between 32-41°F (0-5°C).
Your first attempt doesn't need to be your last, so don't worry too much about getting it perfect. Just don't forget to label each container with the seed type, variety, and harvest date. Keeping a detailed record, in your garden journal, will help you a lot in managing your seeds effectively.
Preventing Diseases and Pests in Stored Seeds
A crucial step in preserving heirloom seeds is ensuring they’re safeguarded from diseases and pests. You've put in the effort to harvest and clean your seeds - a smart move would be to make that effort last.
Here are some points to keep in mind:
Start with healthy plants. Disease-free seeds come from healthy plants, so always choose the best specimens for harvesting seeds.
Keep it clean. Use airtight containers whenever possible to store seeds, ensuring they are dry before sealing them away. This minimizes the risk of mold growth and pest infestation.
Stay cool and dry. Pest and disease proliferation is less likely in a controlled environment. Store your seeds in a consistently cool place with low humidity.
Monitor regularly. Even with precautions, pests and diseases can sneak in. Regularly checking your stored seeds can help catch any issues early on.
Use natural deterrents. Consider natural pest repellents like dried lavender or bay leaves to prevent insect damage naturally without using harmful chemicals.
By prioritizing the health of your seeds even after they’ve been stored, you’re ensuring their viability and vitality for seasons to come. So, take these steps to heart; your future self, and your garden, will thank you.
In Closing
Getting into heirloom seed saving is like becoming part of a living history book. It's more than just planting and watching things grow. It's about keeping a piece of the past alive in your backyard. These seeds are not just plants; they are stories, flavors, and colors passed down through time, and now they are in your hands.
You give life to a little piece of history whenever you plant an heirloom seed. When you save and share these seeds, you are not just growing plants; you are growing traditions. You become a guardian of nature's diversity in your garden.
Remember, this is not a fancy or complicated science. It's about getting your hands dirty, making mistakes, and having fun. You will learn the best time to pick the seeds, how to keep the bugs away, and the best spot in your house for keeping them safe over winter. It might take a few tries to get it right, but that's all part of the adventure.
Grab some of those vibrant tomatoes or those tough-as-nails beans and get started. It's not just about growing plants; it's about growing connections - to our past, to nature, and each other. Let's dive into this journey with a shovel in one hand and a bunch of heirloom seeds in the other, ready to keep these incredible stories growing.
Please read my post on The Essential Guide To Sustainable Heirloom Gardening Practices for a more holistic view.